Replacing the Worm Gear in a Singer Stitching Equipment Version 7033

(how to replace worm gear in singer sewing machine model 7033)
The worm gear is a vital component in the Singer Version 7033 sewing maker, in charge of moving movement from the motor to the handwheel and ensuring integrated operation of the needle and bobbin systems. With time, wear or damages to the worm equipment can cause irregular stitching, sound, or complete mechanical failure. This guide describes the professional procedure for securely replacing the worm gear, ensuring optimal capability of the machine.
** Devices and Materials Required **.
Before starting, gather the following:.
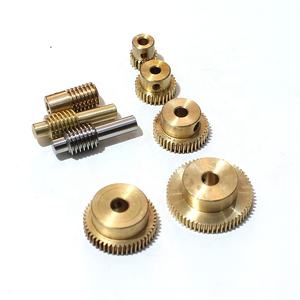
– Replacement worm gear (suitable with Singer 7033).
– Screwdrivers (flathead and Phillips, sizes appropriate for the equipment’s screws).
– Needle-nose pliers.
– Soft fabric or mat to protect the device surface.
– Lubricant (stitching maker oil).
– Safety gloves and glasses.
** Step-by-Step Substitute Treatment **.
** 1. Prep work and Safety and security **.
Separate the embroidery equipment from the power source to eliminate electrical hazards. Place the machine on a secure, well-lit job surface area. Remove the needle, presser foot, and string spool to stop interference. Wear security handwear covers and eyewear to secure against sharp elements.
** 2. Accessing the Worm Equipment **.
Situate the handwheel on the right side of the machine. Eliminate the handwheel screw (normally a little Phillips or flathead screw) utilizing the appropriate screwdriver. Slide the handwheel off the shaft, making sure not to compel it. If resistance occurs, gently rock the wheel while pulling.
Next off, eliminate the faceplate covering the interior systems. This typically includes unscrewing 2– 4 screws along the sides of the plate. Set the screws apart in a classified container to stay clear of misplacement.
** 3. Removing the Old Worm Gear **.
Determine the worm equipment, which is placed on the primary shaft near the motor drive. The equipment meshes with a worm wheel linked to the drive system. Check the gear for noticeable damages, such as used teeth or fractures.
Usage needle-nose pliers to thoroughly disengage any preserving clips or established screws securing the worm equipment to the shaft. If the gear is press-fitted, prevent spying it directly. Rather, use a gear puller tool (if offered) to uniformly draw out the equipment without damaging the shaft. For persistent gears, a small amount of penetrating oil might be put on the shaft-gear interface, adhered to by mild tapping with a soft club.
** 4. Setting Up the New Worm Equipment **.
Tidy the shaft thoroughly with a lint-free cloth to eliminate particles or old lube. Straighten the replacement worm equipment with the shaft, making certain the teeth orientation matches the initial equipment. If the equipment uses a set screw or keyway, safeguard it according to the supplier’s specs. For press-fit equipments, use light stress equally around the equipment’s area until it seats completely on the shaft. Verify that the gear rotates efficiently and meshes appropriately with the worm wheel.
** 5. Reassembly and Examining **.
Reattach the faceplate and handwheel, tightening screws securely however staying clear of over-torquing. Reinstall the needle, presser foot, and thread spool. Oil the worm equipment and nearby moving get rid of a percentage of stitching device oil.
Reconnect the power and test the machine at a reduced rate. Listen for unusual sounds and observe the handwheel’s movement. Make certain the needle and bobbin mechanisms run in sync. If vibration or slippage takes place, reconsider the gear placement and bolts.
** Trick Factors to consider **.
– Always utilize OEM or high-quality replacement gears to prevent premature wear.
– Document disassembly tips with pictures or notes to simplify reassembly.
– Stay clear of excessive pressure during elimination or setup, as this might deform elements.
– Periodically check and lube the gear system throughout routine maintenance.
** Conclusion **.
(how to replace worm gear in singer sewing machine model 7033)
Replacing the worm equipment in a Vocalist Version 7033 calls for precision and focus to detail to bring back the device’s performance. By adhering to these steps, mechanical engineers or professionals can effectively address gear-related issues, expanding the lifespan of the equipment. Regular upkeep and timely replacement of used parts stay necessary for making sure trustworthy procedure in industrial or domestic sewing applications.